
Lately I have been trying more and more to replace white and unfermented flour in my diet with wholegrain and fermented flours. This is mainly from a health perspective as I don’t believe it is good for our bodies to consume so much refined white flour or flour that hasn’t been fermented first to aid in digestion. Although health has been the initial trigger for these ventures into new territory, it has been flavour and texture that have converted my interest into an obsession. Having my own grain mill to grind fresh wholegrain flour helps too – as freshly ground flour is incomparable in flavour to white flour (or even store-bought wholemeal flours).
I’ve been playing around for some time now with both fermenting my pasta dough before rolling and cooking it, as well as incorporating some freshly milled wholegrain flours into the mix. But it was my attendance at the awesome and inspiring grAiNZ gathering at Redbeard Bakery in Trentham last October (2019) that really opened my eyes and drove me to up my pasta game.
More specifically, it was the pasta demonstration by Graison Gill from Bellegarde Bakery that pushed me to take the next level (this video can be viewed at the following link: grAiNZ Day 3 Demonstrations – skip to the 2 hour and 34 minute mark). Graison demonstrated a dough that contained 100% freshly stone milled wholegrain flours from grains grown by farmers at the conference. He also provided some great insight into his formula including reasons behind why hydration and choice of liquid have a significant impact on the handling, flavour and texture of the final pasta.
The biggest changes that I took away from Graison’s demo were as follows:
(1) Replace a percentage of the eggs with water;
(2) Lower the overall hydration for a better mouthfeel;
(3) Incorporate more coarsely ground wholegrain flour or coarse semolina;
(4) And of course, replace the 75% flour in my normal dough that was white with only freshly milled wholegrain flour!
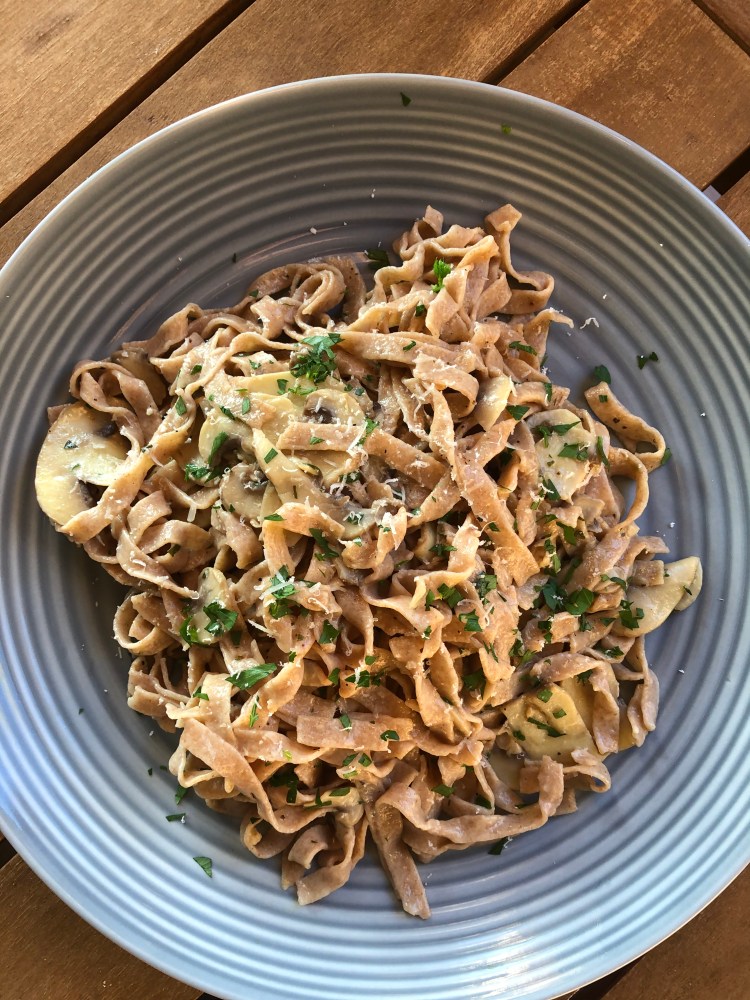
Taking these adjustments to my current formula I have derived at a combined recipe that I think yields an amazingly deep-flavoured pasta dough thanks to fermentation (I opt for both more levain and a longer fermentation period than Graison), contains only wholegrain flour, and is extremely flexible in when you use it (i.e. mix the dough Sunday night, wrap & refrigerate, and sometime that week when you don’t know what to make for dinner roll it out and eat it!)
FORMULA
Yields: 3-4 servings
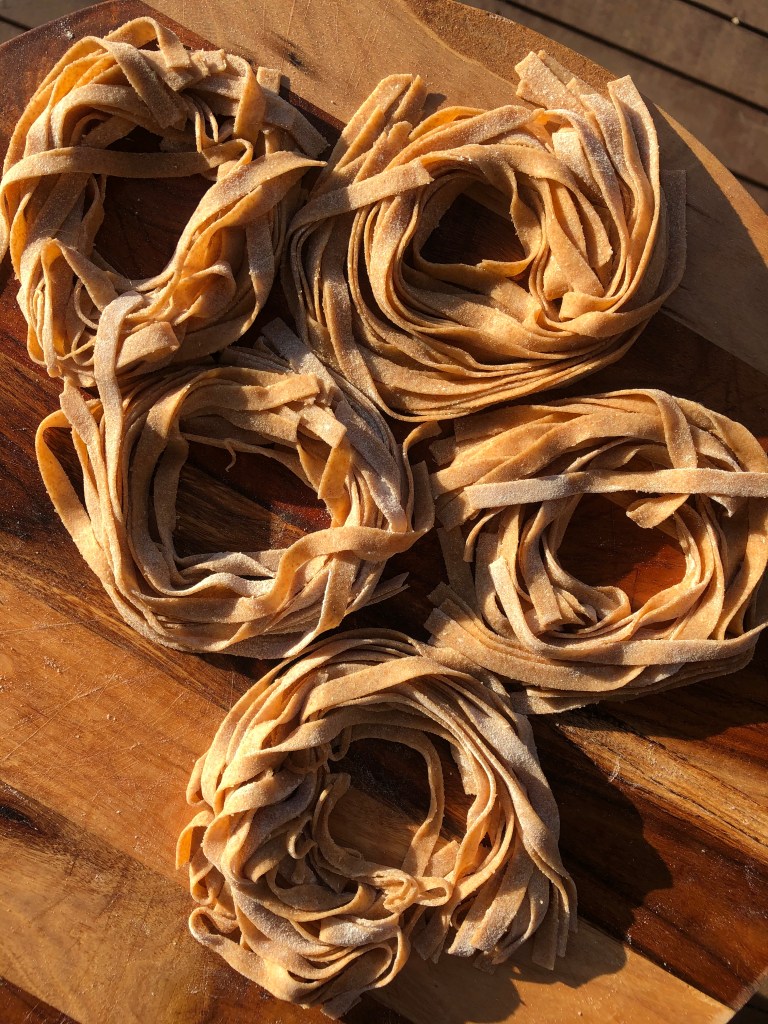
300 grams of wholegrain flour (I like 50% spelt / 50% khorasan)
100 grams of whisked eggs (approximately 2 medium eggs)
50 grams of water
50 grams of 100% hydration sourdough culture*
METHOD
1. Weigh out your flours in a medium sized bowl and push up to the sides so that a well forms in the middle.
2. Measure out 50 grams of your sourdough culture into the well.
3. Pour into the well the cracked eggs and the water.
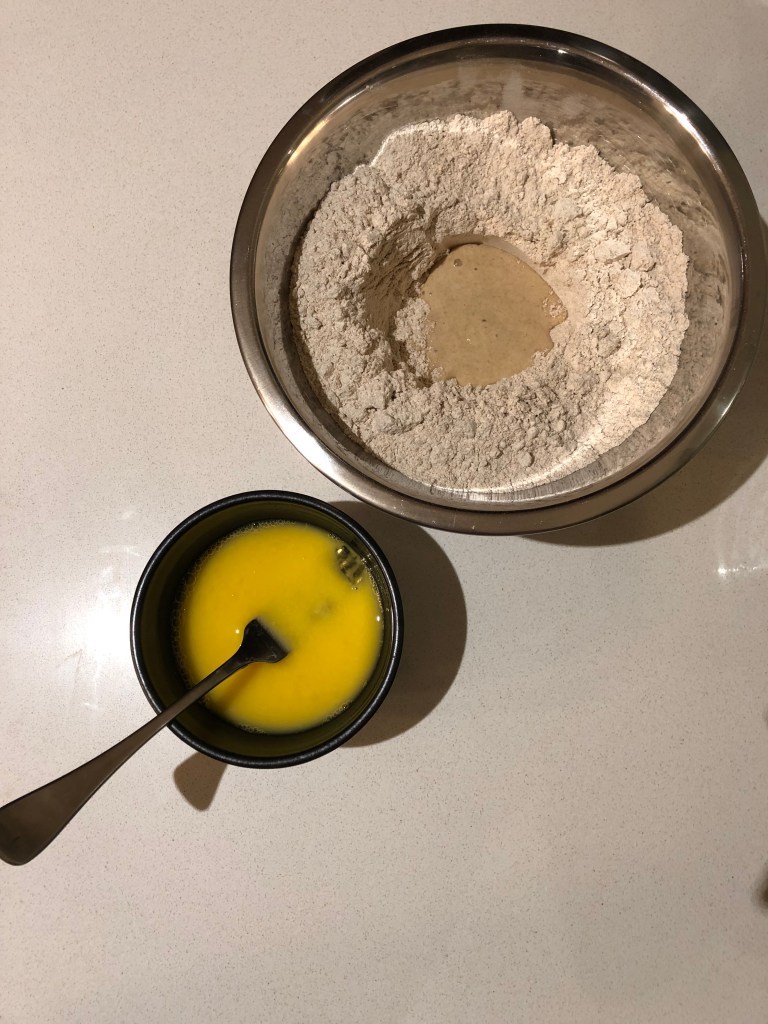
4. Using a fork, begin whisking the starter into the other liquids until it disperses.
5. Once a porridge-like consistency is achieved, continue whisking but gradually moving outwards so that small amounts of the surrounding flour is incorporated bit by bit into the slurry.
6. Once you start to form a dough and whisking is no longer possible, tip everything out onto the bench and continue mixing and then kneading by hand until you have a cohesive mass.
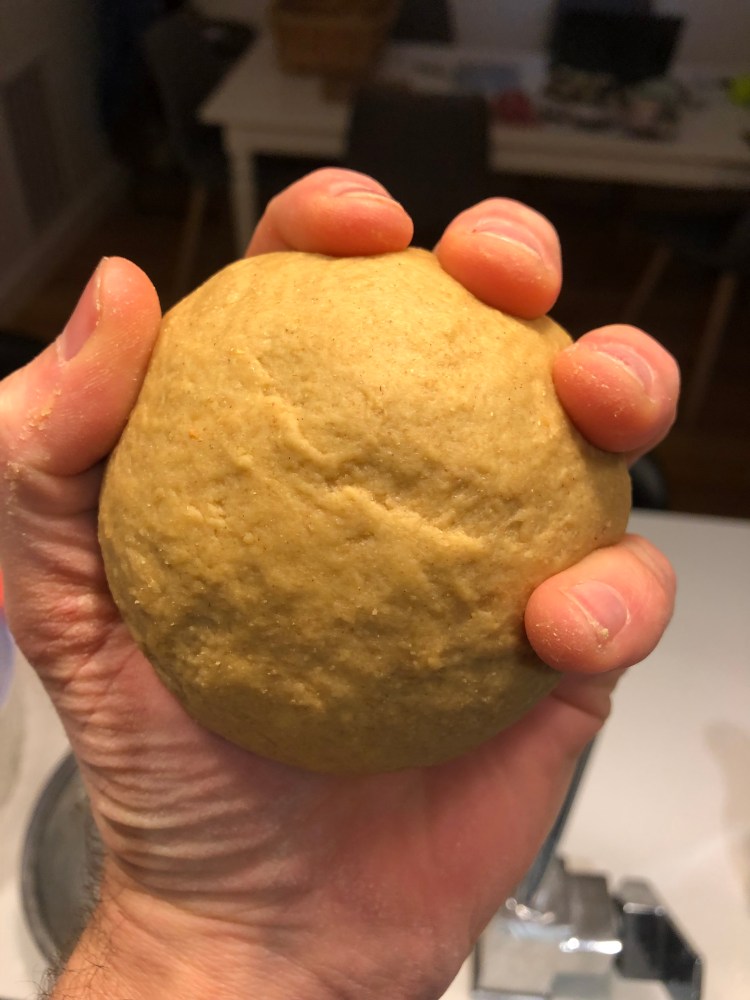
7. Once the dough has come together, leave it on the bench and tip the bowl upside over the dough to help protect from drying out. Wait 5-10 minutes.
8. Return to the dough (you’ll find that even the brief resting period is enough for significant progress to be made both with the hydrating of the flour and the forming of gluten strands) and continue kneading for a further 3-5 minutes until a strong ball is formed that is springy when you poke it.
9. Cover with plastic (or preferably a re-usable) wrap and then place in a tupperware container with a strong-fitting lid (I like the double layer of protection as I tend to leave my dough in the fridge for days and as it is already quite a dry dough, I don’t want it to dry out any further). Place in the fridge.
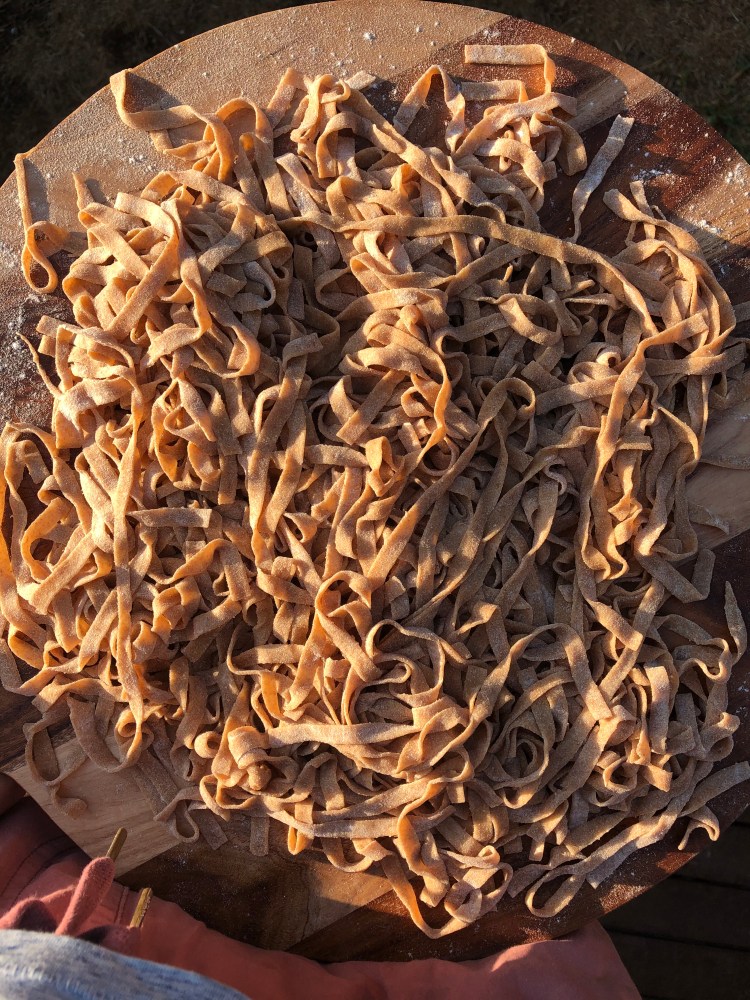
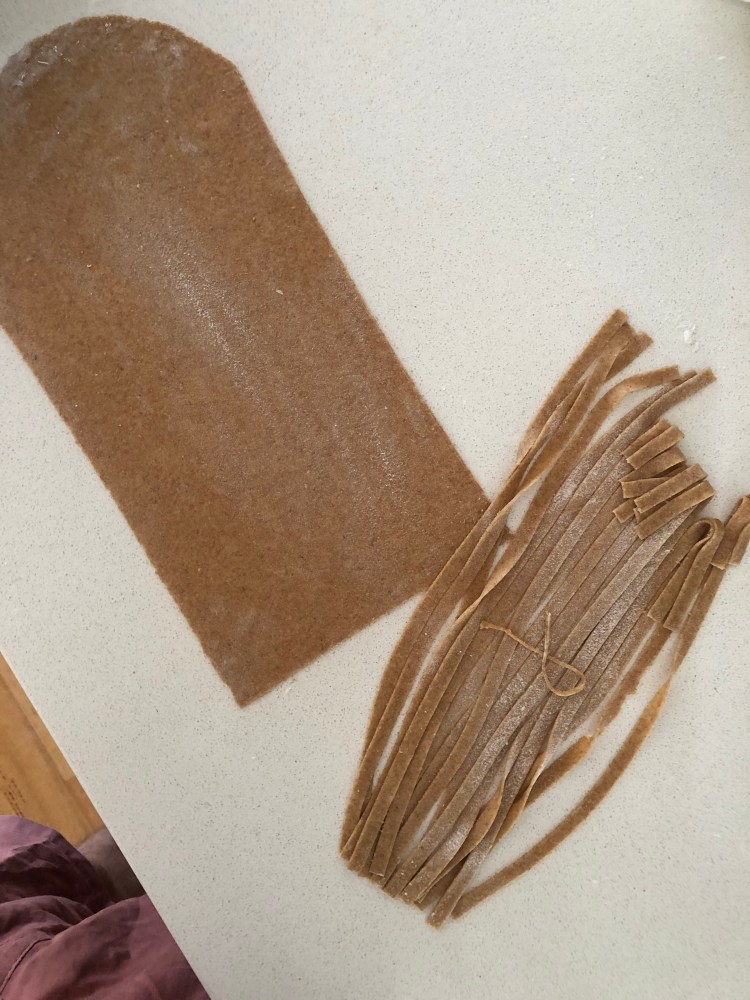
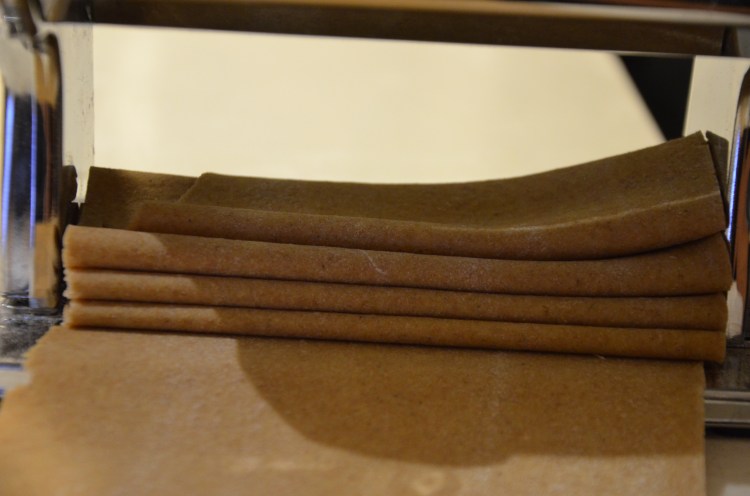
10. Sometime in the next 1-7 days (depending on your taste for those strong, acetic acid flavours of a long cold fermentation) remove from the fridge, roll and cut into your desired pasta shape, cook and enjoy!
*If you maintain a sourdough culture that is less than 100% hydration (that is, a starter where the ratio of water to flour is less than 1 to 1 – also known as a ‘stiff’ starter) then firstly weigh out 40 grams of your starter into a small bowl and whisk together with 10 grams of water to disperse into a more liquid sourdough culture.
